
Sandwich croissants
recipe added: Aug 20, 2023 | edited: Aug 21, 2023
12 croissants
1 hour
20 minutes
4 hours and 20 minutes
Ingredients:
Butter square- 425 grams butter (this is almost 4 full sticks or 2 full cups)
- 60 grams all-purpose flour
- 1⁄2 teaspoon salt (if using salted butter omit this)
- 660 grams all-purpose flour (5.5 cups)
- 50 grams sugar (1/4 cup)
- 28 grams melted butter (2 tablespoons)
- 50 grams special dry milk or non-fat dry milk (1/2 cup)
- 15 grams salt (1 tablespoon)
- 2 whole large eggs
- 390 grams water (1.5 cups + 3 tablespoons)
- 9 grams yeast (2.5 teaspoons)
- 1 whole large egg
- 1 tablespoon water
Related blog post: A perfectly cromulent croissant sandwich
Directions:
Butter square: add butter, flour, and salt into a stand mixer with the paddle attachment and mix for 5 minutes.
Once the butter and flour are fully incorporated remove them from the bowl to a large piece of plastic wrap and using wet hands, form into a rough 8 x 8-inch square and wrap with the plastic wrap. Once the butter is fully wrapped, you can massage it into a more perfect 8 x 8-inch square. Once that is done place the butter square into the refrigerator for at least 30 minutes.
Wash and dry your stand mixer bowl.
Croissant dough: weigh and add all dough ingredients into the stand mixer bowl and knead for 10 to 15 minutes until a smooth dough appears.
Once the dough is smooth, wrap it in plastic wrap in a rough 9x9-inch square and place it in the refrigerator for at least 30 minutes.
Once the dough and butter have been in the fridge and are sufficiently cold, dust your counter or surface with all-purpose flour and then move the dough and butter square to your counter. With a rolling pin or your hands, shape the cold dough into a 12 x 12-inch square.
Place butter square diagonally in the middle of the 12 x 12 square of dough. You can see in the photo below the butter square on top diagonally inside the larger dough square.
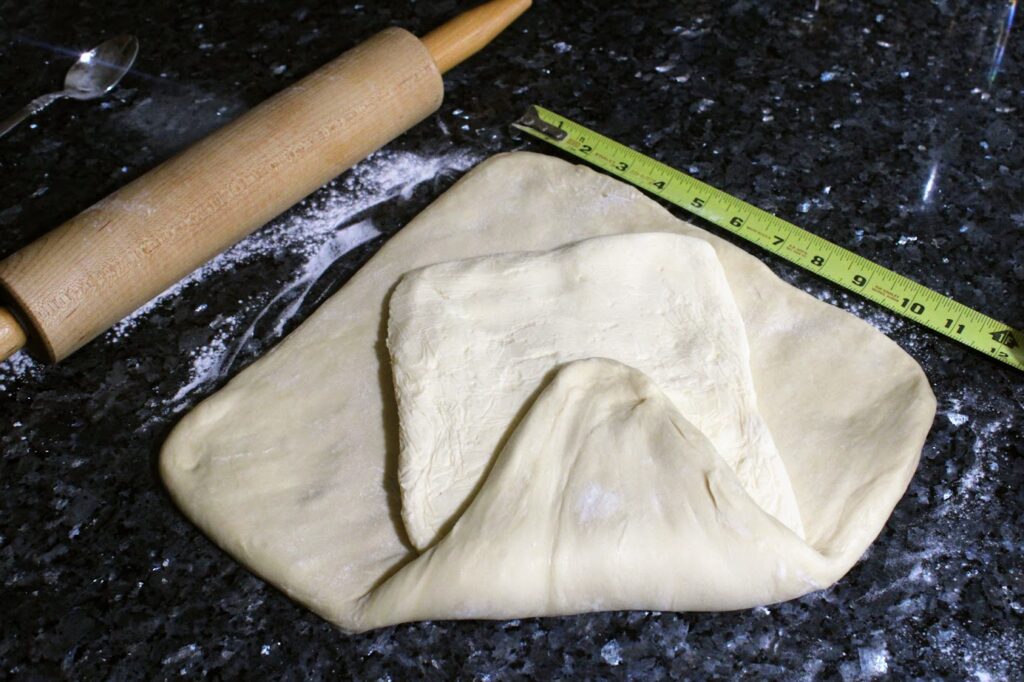
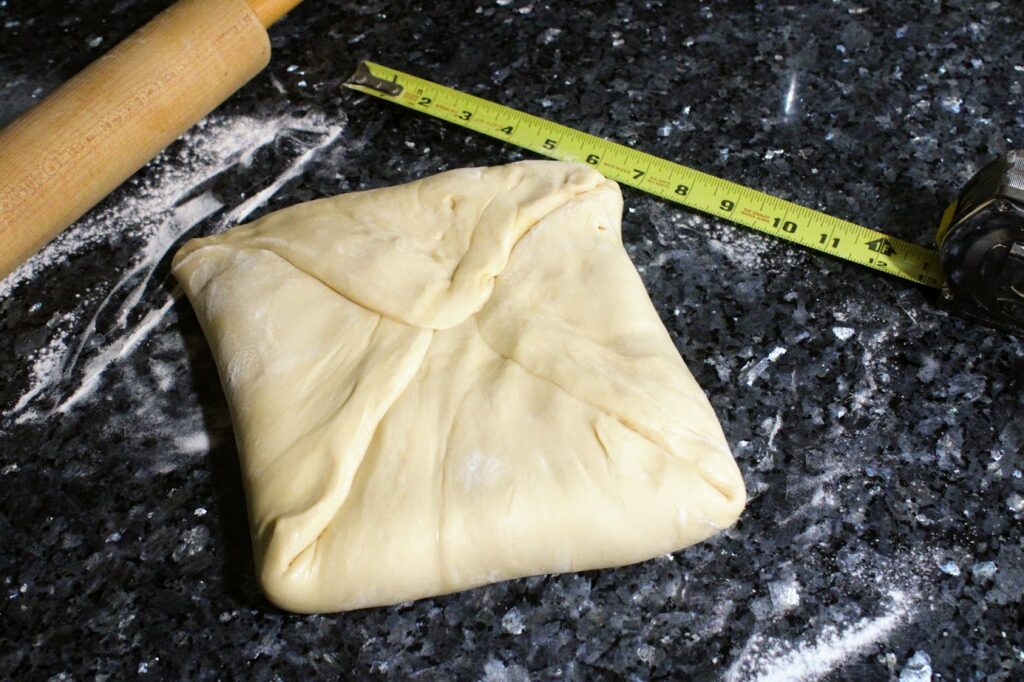
Fold in all four corners to fully cover the butter block with dough (see the above photo). Pinch the seams closed well.
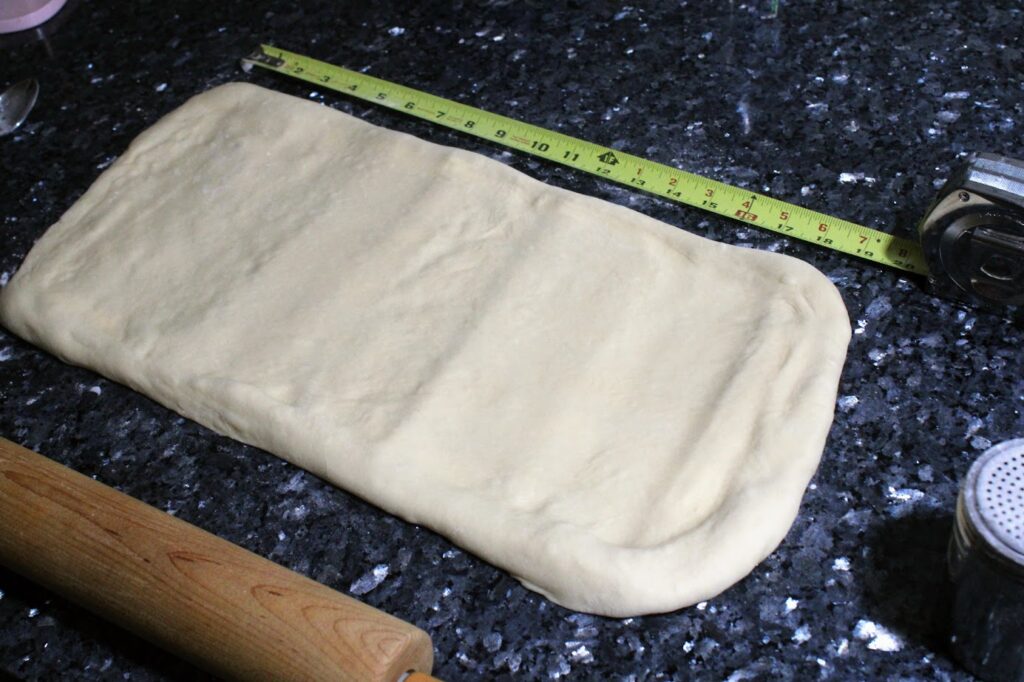
Turn the dough square over and slowly roll it into a 20-inch by 10-inch rectangle.
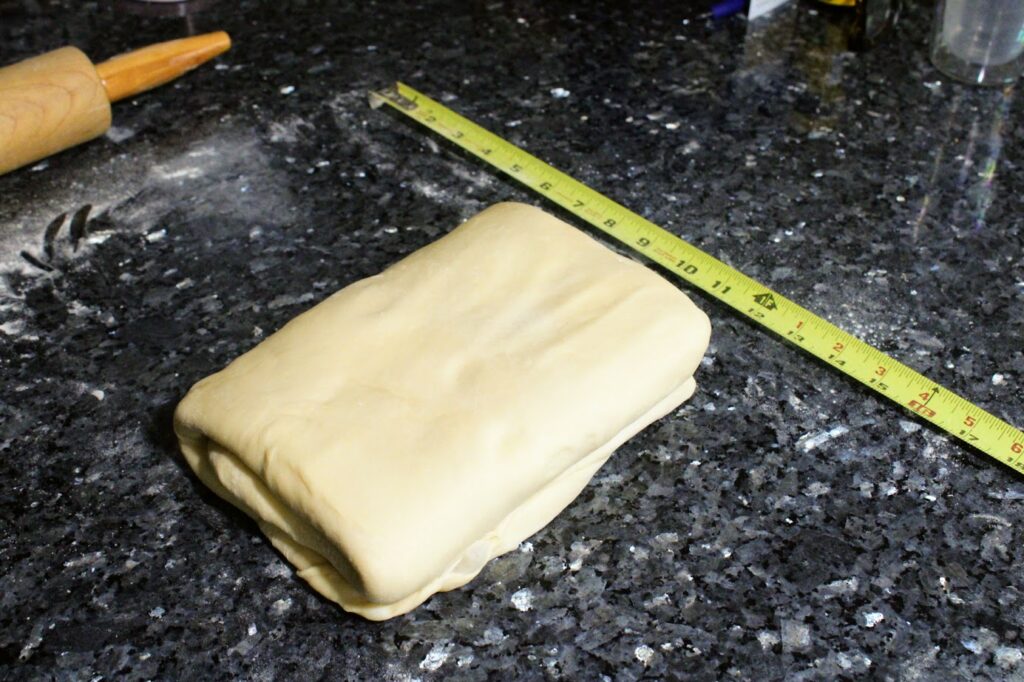
Fold the dough over on itself the long way twice, like a brochure. See image below:
Turn the dough 90 degrees on the counter and roll it out again into a 10 x 20-inch rectangle.
Again, fold the dough on itself like a letter or brochure, and then wrap the dough in plastic wrap and replace it in the refrigerator for another 30 minutes.
Repeat the same 10 x 20-inch rollouts as you did in the steps above and then fold the dough into a letter or brochure folds another 2 times. Rotating the dough 90 degrees again after the first time.
Divide and cut the dough into two somewhat equal pieces.
Wrap both pieces and place them in the fridge for at least an hour or overnight.
Croissant shaping: remove one piece of dough and roll it into a 10 x 19-inch rectangle.
Trim edges all around so that you're left with a 9 x 18-inch rectangle. Make a mark on the bottom for every six inches and then at the top of the long side measure 3 inches make a mark then six inches make a mark and then finally make your last mark after another six inches. The next image below should help this process seem clearer.
Basically, after you trim the edges, you should have a rectangle 18 inches wide which means you should get five isosceles triangles and two right triangles that you can actually pinch together into one. Note in the image below that triangles number 2 through 6 are full isosceles triangles and 1 and 7 are right triangles.

Once you have cut the triangles apart from each other, you can join sections 1 and 7 together to form another isosceles triangle that is the same size as the rest of your triangles. Pinch the seam closed to join them fully.

Now, working with one triangle at a time, keeping the six-inch side closest to you, cut a 1-inch notch in the bottom part of the triangle. This will allow you to stretch the triangle a bit when rolling which helps with the curved shape. Stretch out the top point of the dough and stick it to the counter or surface if necessary to keep it lengthened.
Carefully roll the dough. This graphic should show the process from a side view.

Once each croissant is rolled, make sure the tip or point of the dough is underneath the whole roll so that it does not detach itself from the roll. The weight of the rest of the croissant will keep it rolled up if that tip is under it.
Place all your rolled croissants on a parchment-lined sheet pan and loosely cover them with plastic wrap. Allow them to rise for 1 to 1.5 hours or until very puffy.
Preheat the oven to 400 degrees F (205 C).
Mix a tablespoon of water and a whole egg in a bowl until fully combined. Using a brush or spoon carefully egg wash, paint each croissant but try not to paint the cut edges of the dough. An egg wash helps the dough brown and makes the finished croissants a bit shiny, but it also works as glue and will keep your croissant layers from separating if you paint too much egg wash on the exposed cut edges.
Bake at 400 F for 15 minutes turning the pan 180 degrees at the halfway point.
Once 15 minutes have elapsed, peek at the croissants to make sure they aren't browning too much, and then bake carefully for the next 5 to 10 minutes, checking every 2 or 3 minutes to make sure they do not get too brown on the top.
When the croissants are browned to your liking, remove the pan from the oven and move each croissant carefully to a cooling rack to cool.
Have you made this recipe? Share on Bluesky or Instagram, tag @beerinator and let him know!
Advertisement
One response to “Sandwich croissants”
Leave a Reply
Related Sandwich blog posts
Here are any sandwich blog posts on this site where this particular recipe has been used or featured.

A perfectly cromulent croissant sandwich
Possibly too many words about making croissants plus a sandwich.

Croissanh mi? No, croissanh u!
Some people on twitter made me do this.
Thank you so much!
I lost this very exact recipe and had to use other sites. You are precise and informative the way a recipe should be shared.
Keep up the good work and thanks again!