
Kaiser rolls
recipe added: Nov 05, 2021 | edited: Dec 21, 2025
6-8 Kaiser rolls
30 minutes
17 minutes
2 hours and 47 minutes
Ingredients:
Kaiser dough- 360 grams bread flour (3 cups)
- 7 grams instant yeast (1.5 teaspoon)
- 16 grams honey (1 tablespoon)
- 8 grams salt (1.5 teaspoon)
- 1 whole large egg
- 28 grams olive oil (2 tablespoons)
- 170 grams warm water (3/4 cup)
- 1 to 2 tablespoons milk
- poppy seeds or sesame seeds
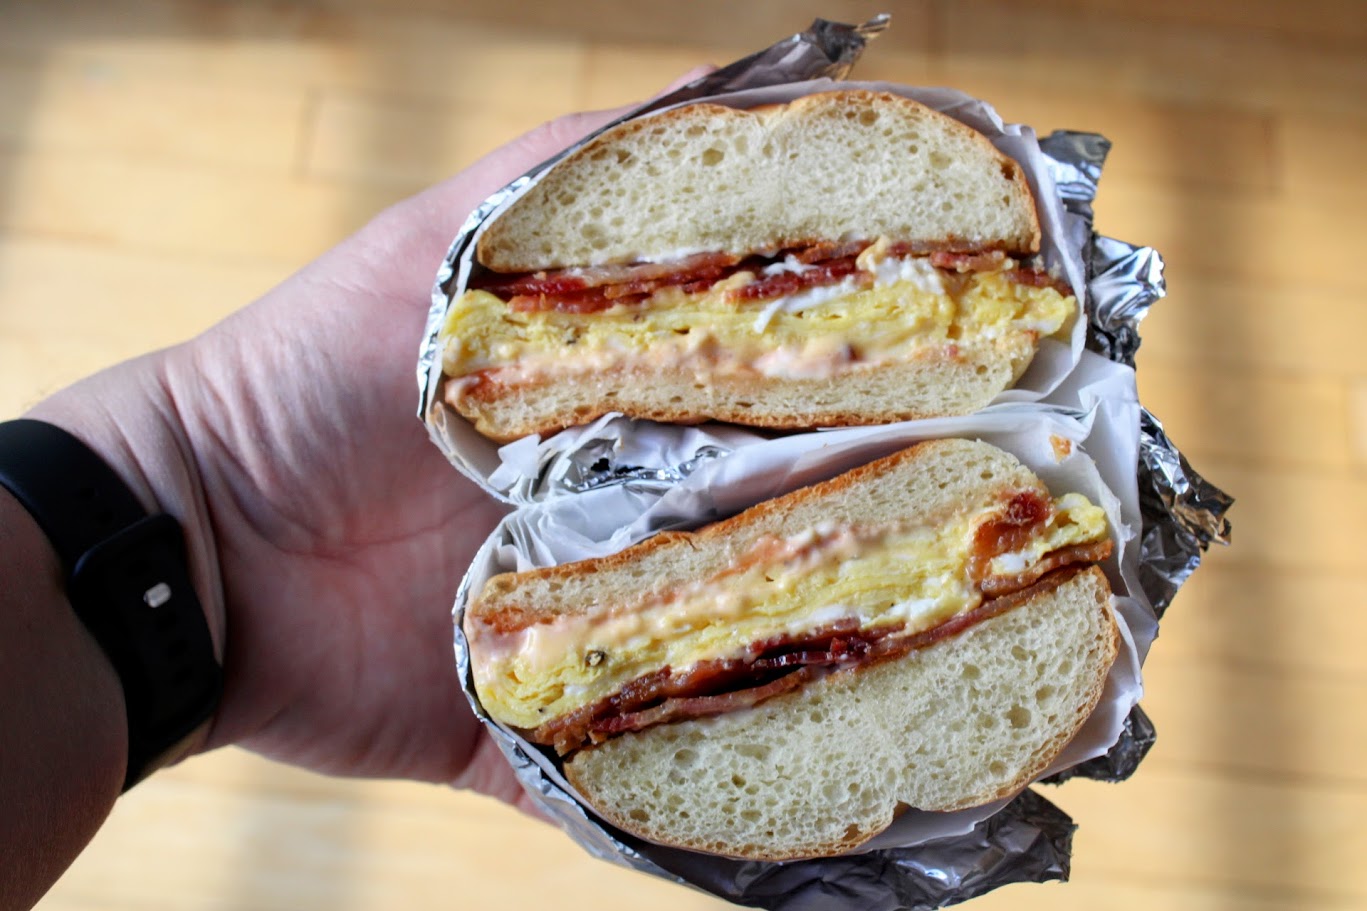
Related blog post: New Jersey's breakfast sandwich
Suggested Equipment
Kaiser Roll Stamp/Cutter (optional)
Directions:
Weigh or measure out all of the Kaiser dough ingredients into a large bowl or the bowl of your stand mixer.
If using a stand mixer, mix on medium speed for 8 minutes. If you are kneading by hand, you will want to knead for at least 10 minutes until you have a smooth, soft dough.
Form the dough into a ball shape and place in a lightly oiled bowl to rise for at least one hour and up to one and a half hours.
After an hour or so, your dough should have doubled in size. At this point, you can either divide your dough into six equal pieces or measure out the sizes that you want for your rolls. I personally like to measure, and I shoot for somewhere between 90 and 120 grams per roll. 90 or 100 grams is probably around the sweet spot for me, but feel free to try different sizes. Kaiser rolls are often fairly wide and large, so if you really want that, shoot for 120 grams.
If you have a Kaiser roll stamp:
Once you have your dough portioned into 6 or more dough portions, on a lightly floured surface, roll all of your dough portions into balls. At this point, I like to cut out a small 5 x 5-inch piece of parchment paper for each dough ball that I have. You should roll each ball as tightly as you can to make sure the top is smooth. Using your Kaiser roll stamp: lightly dust it with flour and then press down directly in the middle of your dough ball. Do not press all the way through the dough, but get pretty close to the other side. Then carefully flip the dough ball upside down onto one of your 5x5 pieces of parchment. You want to let each roll rise upside down so that it keeps the shape of the stamp. Repeat until all dough balls are stamped and placed on a small sheet of parchment. Carefully place each piece of dough and parchment onto a sheet pan.
If you do not have a Kaiser roll stamp:
Roll each of your dough portions into a snake-like log. You will want each log to be 10 to 12 inches long. After you have a log of dough, you will want to make a loop and circle the dough back in through the loop twice, and then tuck in the ends. This is a lot easier to watch than to explain in text. I suggest this Kaiser roll shaping video for an easy, quick example.
Cover the sheet pan with another sheet pan or plastic wrap and let the rolls rise for another hour.
Pre-heat oven to 425 degrees F.
While the oven is pre-heating, if you used the Kaiser roll stamp, you will need to very, very carefully flip your risen rolls back over so that the Kaiser stamps are on the top. This is why I suggested using 5x5 cut squares of parchment. The parchment should help you flip without deflating each roll.
If you want poppy-seed or sesame-seed-topped Kaiser rolls, pour 1 to 2 tablespoons of milk in a small bowl. With a pastry brush, very lightly brush each roll with milk. If you are planning to use poppy seeds or sesame seeds on your rolls, sprinkle those on after the roll is painted with milk.
Bake for 15 to 17 minutes. I like to rotate my sheet pan 180 degrees from front to back about halfway through the baking process to ensure even baking and color on the rolls.
Allow to cool fully before slicing and sandwiching.
Have you made this recipe? Share on Bluesky or Instagram, tag @beerinator and let him know!
Advertisement
8 responses to “Kaiser rolls”
Leave a Reply
Related Sandwich blog posts
Here are any sandwich blog posts on this site where this particular recipe has been used or featured.

New Jersey's breakfast sandwich
If you thought the Garden State would have vegetables in their state sandwich, you'd be wrong.

Bourdain's mortadella and cheese
This is not your mom's bologna and cheese. Unless your mom's name is Anthony.
Baconeggandcheese
If you say it correctly, New Yorkers won't be able to guess that you're from Iowa. Also, memorize the phrase saltpepperketchup.
I didn’t have a Kaiser roll stamp, but the next best thing, and just as good was my silicone meat chopper. It worked perfect. Wish I could post a picture of it. They are available on Amazon and even other local stores.
Sorry, Joyce. I missed this comment, but that’s a genius idea to use that tool instead!
I would like to buy the same dough that they use in 7/11’s in New Jersey.
Best hard rolls ever
You’ll need a friend in NJ & then go pick up a gallon of tap water 🙂
Then you can make the “same” dough.
Grew up in Jersey City.
Moved to Tennessee a year ago ..they DO NOT have bakeries here..you just can’t find hard seeded rolls..growing up on long island we had bacon, egg and cheese on a hard oll all the time …I tried this recipe and it was very close …I needed more water than the recipe called for but it was very good
As a Southern NY Ex-Pat, my memory of a Bacon, Egg & Cheese on a Roll (SPK, of course) has taken me on a quest for the perfect home oven recipe to recreate that iconic staple of my younger breakfasts. We had 10 delis in my small river town, they all got their bead from Willow-Sunny Bakery. There was nothing like that light but crispy crust of those hard rolls. The crust is what truly makes them legendary. I’ve spent a good many years scouring my baking books and the internet for the closest iteration. Jon, the only thing about this recipe that falls short is the egg. Adding egg to the recipe shortens the gluten strands and softens the crust. And we miss out on that light, crispy crunchy sensation. They were tasty, not gonna take that away. Kudos on the try, but I’ll have to continue my quest elsewhere. sigh
I just made your recipe, cooling now. They look good, I used a razor blade. I’m a refugee from Philadelphia and I want to see how close they come to Amoroso’s. I used an extra tsp of yeast as it sat for over an hour and did nothing. I know it’s not my yeast as it made an ultra fluffy Greek style pizza two days before. I did not proof my yeast, I usually use instant and add it right in. I went back and proofed 1 tsp of yeast and got the desired result. I teach baking in a tech school.
The 1 hour proofing for the second round was too long, my rolls looked over proofed and started falling , next time I will only do 30 minutes.