
Meltuary week three is here!
For the entire month of January, we will be celebrating what I have named Meltuary: a celebration of all things cheesy and melty.
Some people might say that I’m copying Pizza Hut in the creation of these pizza melts and they’d be correct. But to be fair, some other people might say that Pizza Hut copied Papa John’s Papadias and released them as Pizza Hut Melts. So I’ve decided it’s up to me to steal the idea back for the people!
Pizza Hut’s commercials running through televised football games recently heavily inspired my decision to make these flatbread-focused melts. Let’s talk about them, try one and then make a few.
What are Pizza Hut Melts?

A Pizza Hut Melt is very similar to a quesadilla but instead of using a flat flour tortilla, it’s using a yeast-leavened flatbread like naan, pita bread or more specifically a thin pizza crust. I don’t have inside knowledge, but the official Pizza Hut Melts are almost certainly Pizza Hut’s Thin ‘N Crispy pizza dough cut in half for each melt.
It’s thin crust, but it’s thicker and crunchier than a tortilla typically used in a quesadilla. Each Pizza Hut Melt is stuffed with toppings—now fillings—and mozzarella cheese.
Pizza Hut Melts are cooked with a little bit of oil on the outside to create a crispy, fried-like exterior and the top is then dusted with Pizza Hut’s breadstick seasoning.
Pizza Hut Melts are currently available in four varieties. They have Pepperoni Lover’s, Meat Lover’s, chicken bacon parmesan, and buffalo chicken pizza melts. Each Pizza Hut Melt comes with a dipping sauce which seems to be either ranch dressing, buffalo sauce or marinara dipping sauce depending on which version you order. I used the official Pizza Hut app to order one and there was no way to customize anything, so you get what they give you if you decide to try one.
Pizza Hut Melts review
I took my first trip to Pizza Hut in more than a decade for this melty adventure. Scroll through for a review and a few photos I took of the official Pizza Hut Pepperoni Lover’s Melt.


My experience with the only Pizza Hut Melt that I tried was just ok. I feel like the crust they use is a little too cracker-y and crunchy. As I wrote above, this is almost certainly the Thin ‘N Crispy crust, which is also like a cracker in terms of crispiness and crunch factor. I think this would have been better if it was a thicker and chewier crust instead of just crunchy.
The Melt I received seemed light on the fillings. There’s cheese and pepperoni in there, but it gets lost by the cracker crust and the seasonings on the outside. If you unfold one of these melts, you will see that it is two pieces of pizza folded over on top of each other, but it feels like it is using just one slice worth of toppings. Even if they didn’t add more cheese, they could have doubled the pepperoni since it’s supposedly targeted toward people who love pepperoni.
The marinara dipping sauce isn’t my favorite. It’s way too sweet. If this is supposed to be a “Pizza Melt” why aren’t they using pizza sauce? This is honestly my least favorite part of this melt experience, and their solution is right in front of them with the sauce they typically use on their pizzas.
The breadstick seasoning on the outside is a great idea and worked well. This was the highlight of this whole concept and one of the reasons I wanted to tackle it and make my own version.
Overall, the Pizza Hut Melt that I tried was fine, but I would not order one again. I would just order a pizza instead. I think the idea of these pizza melts is solid though and that’s why I made my own. Read on to see what I did.
Note: I reheated half of this Melt in the oven @ 350 F for 10 minutes the next day and it softened up the crust and the whole thing was better. The crust wasn’t quite as cracker-y, and each bite was more enjoyable than the original un-reheated version.


If we’re going to make some of these flatbread melts, first we need some flatbread.
Puffy flatbread
I have shared this flatbread recipe before for another fast-food concept. But this time I made rolled the dough out thinner and made the flatbreads much wider. For these flatbread melts, we need some dough that’s thicker than a flour tortilla but still thin. In my experience with the Pizza Hut Melts they were way too crispy and that is due to some sort of mechanical process they use to make their Thin ‘N Crispy crust so consistently thin. Unless you’re a robot, we don’t really have to worry about that here.
Using my puffy flatbread recipe, I weighed out between 115 and 125 grams of dough balls. You can make 4 to 5 from my recipe. I made two batches for these melts and both times I ended up with 4 eight to ten-inch-sized flatbreads and one much smaller flatbread that I would eat with another meal or use for another purpose.
My goal was to try to roll the dough to around 8 to 10 inches which left me with a thin dough that is almost see-through in a few spots. Then I cooked the dough like any other flatbread in a dry skillet until bubbly and browning.


When you make flatbreads or tortillas, make sure to have a clean kitchen towel to put your finished flatbreads into. Keep them covered because they will steam themselves into a very soft and pliable texture. If you need to warm them again later, steam is a good option, and you can achieve this in a microwave on a plate with a slightly damp paper towel for 20 to 30 seconds. If you don’t have a microwave, warming in a dry skillet for a minute or two works well to soften things up too.


Puffy flatbread
Soft and puffy flatbread can be used for Sandwich Tacos (thanks Taco Bell) or it can be as a substitute for naan or pita. Put some tomato sauce and melt some cheese on top and you've got yourself a fantastic personal pizza.
Get RecipeThe cheese selections
In these melty sandwiches, I went all in on shredded whole-milk mozzarella. This isn’t the fresh stuff that comes in a ball that is soft and squishy. This is the stuff that is firm enough that you can grate on a grater. You could add some parmesan cheese to the inside if you want, but the outside and the breadstick seasoning will also introduce parm flavors to the finished melt.
Pizza sauce
We don’t want any damn marinara here. These are pizza melts so we’re using pizza sauce.
This is my wife’s pizza sauce recipe that we make when we have homemade pizza night. But you can get away with your favorite store-bought sauce if you want. You also may want to heat up a bit of extra sauce for dipping the melt, but I never felt like extra sauce was needed.

Robin's pizza sauce
A slightly spicy, slightly sweet tomato sauce that's great for your next thin crust, thick crust, or even French bread-style pizza.
Get RecipeBreadstick seasoning
This recipe replicates the seasoning combination that Pizza Hut uses on its breadsticks. It’s not a perfect and exact copy, but it’s close and it tastes really good.
In these Pizza Melts, we dust the outside of the flatbread right after it comes out of the lightly oiled frying pan. At this point, the dough should still be a tiny bit oily from the cooking process which makes the seasoning stick well.
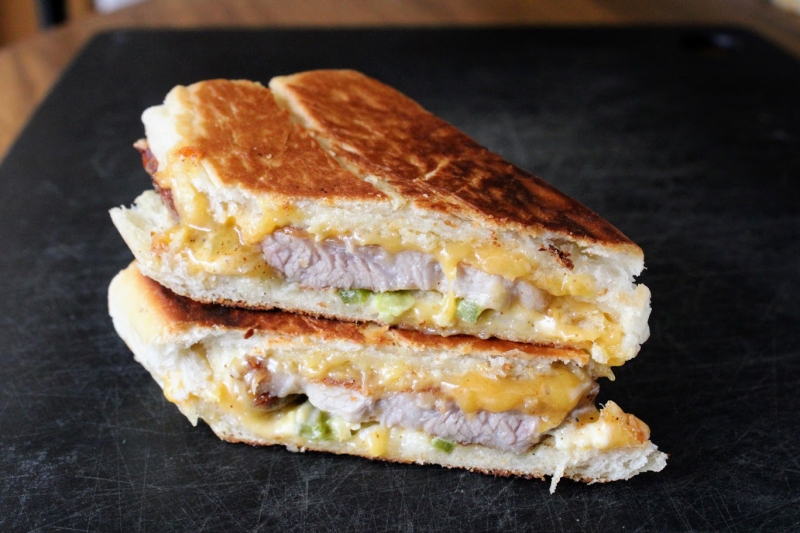
The seasoning is heavy on parmesan cheese, with onion and garlic flavors that back up the cheesiness. Adding seasoning to the outside of a melt or sandwich definitely makes a big impact as I wrote about in my crispy pulled pork melt back at the beginning of Meltuary.

Breadstick recipe
Here’s my breadstick recipe if you want to make these for your next pasta night. These are really similar to the breadsticks that you will get at a chain pizza restaurant like Pizza Hut.

Super soft and crispy parmesan breadsticks
Everyone loves soft, savory, crispy sticks of flavored bread. Not an exact copy of Pizza Hut breadsticks, but these are similar.
Get RecipeCooking process
Here’s a little list of the cooking process. This process is also in the recipe below, but this is a shortened list to share the gist. I’m a poet and I didn’t know it.

- Heat up your toppings
- Warm the “inside” of the flatbread up on the hot surface
- Add cheese and toppings to one half of the warm “inside”
- Fold flatbread over to sandwich toppings
- Add a couple of tablespoons of oil to pan
- Pan fry exterior of the melt until crispy and golden brown
- Add breadstick seasoning to the top
Placing the flatbread in a pan dry to get the first side hot, will help warm up the insides of your melt because this first side will end up being on the inside. This will help melt the cheese.
Then you add cheese, meat/toppings, sauce, and then even more cheese. Fold over and add a couple of tablespoons of oil to the pan. Move the folded flatbread into the oil after it heats up to help crisp up the outside by pan frying the outside.
When the melt is golden brown, it will still be a bit oily from the pan and this is the perfect time to add the Parmesan-based breadstick seasoning so that it will adhere to the outside of the flatbread.
Test version aka steak and spinach
I had some leftover steak and creamed spinach from Christmas eve dinner when I was originally testing this recipe and it would have been a crime to throw it out. So, I decided to use the leftovers in my first trial run for this melty handheld sandwich thing. Turns out, it was fantastic. It appears you might be able to make a flatbread melt out of practically anything.


Pepperoni lover’s flatbread melt
This is the only version that I tried the actual Pizza Hut version for, and I’ll promise you that mine was way better. This was the first pizza-flavored variety that I made, and I added a couple of tablespoons of pizza sauce in with the cheese and pepperoni. Pizza Hut does not add any sauce, and I feel that’s a mistake. A little sauce goes a long way to harmonizing with the cheese and meat.


Cooling this sandwich or any melt-style sandwich is a good idea. Placing a hot, crispy sandwich flat on a cutting board or plate directly out of the pan will force the bottom of your sandwich to steam itself and become soggy. The sandwich, if melted properly, will be steaming hot in the middle when it comes out of the pan, so a couple of minutes of cooling time will only help your sandwich experience and it will lessen the chance of you burning your mouth.
Here’s my recipe for pepperoni lover’s flatbread melts, but if you would prefer one with even MORE MEAT, my meat lover’s flatbread melt and a bunch more photos is down below this recipe.

Pepperoni cheesy flatbread pizza melt

A cheesy flatbread melt for folks who just can't get enough pepperoni. This is an attempt at a copycat version of a Pizza Hut pizza melt.
Ingredients:
Puffy flatbread- 305 grams all purpose flour (2 1/2 cups)
- 15 grams olive oil (1 tablespoon)
- 4 grams instant yeast (1 teaspoon)
- 7 grams salt (1 teaspoon)
- 227 grams warm water (1 cup - 100 F or so)
- 2 tablespoons finely ground parmesan cheese
- 1 tablespoon garlic powder
- 2 teaspoons dried oregano
- 1⁄2 teaspoon dried onion flakes
- 1⁄2 teaspoon salt
- 1⁄4 teaspoon ground black pepper
- 1⁄4 teaspoon or small pinch of MSG (optional)
- 1 8 to 10-inch flatbread (from above)
- 3 to 4 ounces mozzarella cheese, shredded
- 10 to 20 slices of pepperoni (as much as you like)
- 1 to 2 tablespoons pizza sauce
- 1 to 2 tablespoons neutral oil like canola or vegetable oil
- 1 tablespoon breadstick seasoning (from above)
Directions:
Puffy flatbread: Add all your ingredients to a large bowl.
Mix everything thoroughly with a spoon until there's no dry flour in the bowl. This dough should be pretty wet and shaggy.
You will want to knead with your hands at this point but you should add as little extra flour as possible. I suggest oiling your fingers and possibly adding a little extra oil to the bottom of the bowl before kneading which should help a little with the sticking problems. Knead as much as you can, about 2 or 3 minutes.
Get the dough into roughly a ball shape and let it rest in the bowl (covered) in a warm spot in your kitchen for one hour.
After one hour, flour a flat surface and dump out your proofed dough. At this point, you will want to divide the dough into 4 or 5 pieces. If you have a scale, I shot for 115 to 125 grams each for an 8 to 10-inch round pastry.
Roll each portioned dough piece out into balls.
Place a large skillet or griddle over medium-low heat.
While the pan is pre-heating, start shaping each dough ball one at a time into a disk. You will need to sprinkle flour on the dough and the flat counter if the dough is really sticky. Press or roll (with a rolling pin) the dough into flatter and wider disks. Flatbread will puff up, but it will not puff out, so the diameter of the disk you have pre-cook is what you will end up with after cooking.
Once you have an 8 to 10-inch diameter disk, transfer it carefully to the hot skillet or griddle. Cook for 2 minutes on the first side and flip. Continue cooking for around 2 minutes on each side until you start seeing brown spots on the dough. The flatbread may puff up during this process and that is a good thing. Press it down with a spatula to keep it consistently cooking.
Once your flatbread is spotted on the outside and puffy, add it to a plate or pan covered with a clean towel. The towel allows the flatbreads to steam themselves a little which makes them even more pliable.
Continue this process for all of your dough balls until they are all turned into flatbreads.
Breadstick seasoning: add all of the breadstick seasoning ingredients into a small bowl. Stir well to combine. Store in a sealed container or zip-top bag in the refrigerator. This mixture will clump up, but you can shake or stir it well to break up the clumps.
Melt assembly: add your 8 to 10-inch flatbread to a dry skillet over medium heat. After a couple of minutes on the hot pan, the flatbread should be warm and more pliable.
Flip the flatbread over and immediately start adding half of your cheese over one-half of the exposed flatbread. Remember, we're going to be folding this over on itself in the very near future.
Scatter the pepperoni evenly on top of the cheese and then drizzle on 1 to 2 tablespoons of pizza sauce. Top everything with the rest of the cheese and fold the flatbread in half, covering the cheese, meat, and sauce.
Slide the folded flatbread to the side of the pan and add 1 to 2 tablespoons of neutral oil, like canola or vegetable directly to the pan. Allow the oil to heat up for 30 to 45 seconds and then slide the folded flatbread on top of the oil. The oil will help fry and crisp up the outside of the flatbread melt. Cook for another 1 to 2 minutes.
After a couple of minutes, flip the flatbread and check to make sure it's turning golden brown. Let the second side cook for another 1 to 2 minutes and flip again. Keep cooking and flipping until both sides of your melt are golden brown and crispy.
Remove the pepperoni melt to a cooling rack or a paper towel-lined plate and sprinkle the top with breadstick seasoning.
Allow the melt to cool for 2 minutes and serve.
Meat lover’s flatbread melt
I packed this one with four different types of meat, ground Italian pork sausage, Canadian bacon, regular bacon, and pepperoni. This is missing the “seasoned pork and beef” that is on Pizza Hut’s Meat Lover’s, but I think my version has enough to be suitable for people who love meat.


All-the-meats cheesy flatbread pizza melt
Four different meat options are squeezed into this cheesy flatbread pizza melt. This is a copycat version of a Pizza Hut pizza melt.
Get Recipe

Check back next week for Meltuary week four!
Make a pizza melt in the meantime. Next week we’re going to France!

Pam says:
I wanted this to turn out great so much, but I must have done something wrong. I don’t think my proven dough was wet enough. It’s too thick.
Maybe I need to add more water?
The bread turned out thicker than in the pics.
Jonathan Surratt says:
Pam, I don’t know exactly how to diagnose this but did you weigh your ingredients or did you measure them out with cup measures? And the other idea I have is whether the weather was really dry the day you were making this? The water needed in a recipe can vary a whole lot depending on the humidity. I will try to make it again tomorrow to see if I should add a sliding scale for the water needed.
Pam says:
Thank you for your reply!
I did weigh the ingredients. I’m thinking that I didn’t add enough water because my Flatbread didn’t turn out very soft.
But the breadsticks and the seasoning were on spot! VERY tasty! I’m making this again tonight along with the melt. I’ll add more water this time. Thank you for a great recipe!